

The Course
Hunter's Glen was designed by award winning Golf Architect Rick Jacobson to provide 18 hole enjoyment for all golfers living in and visiting Northeast Wisconsin.
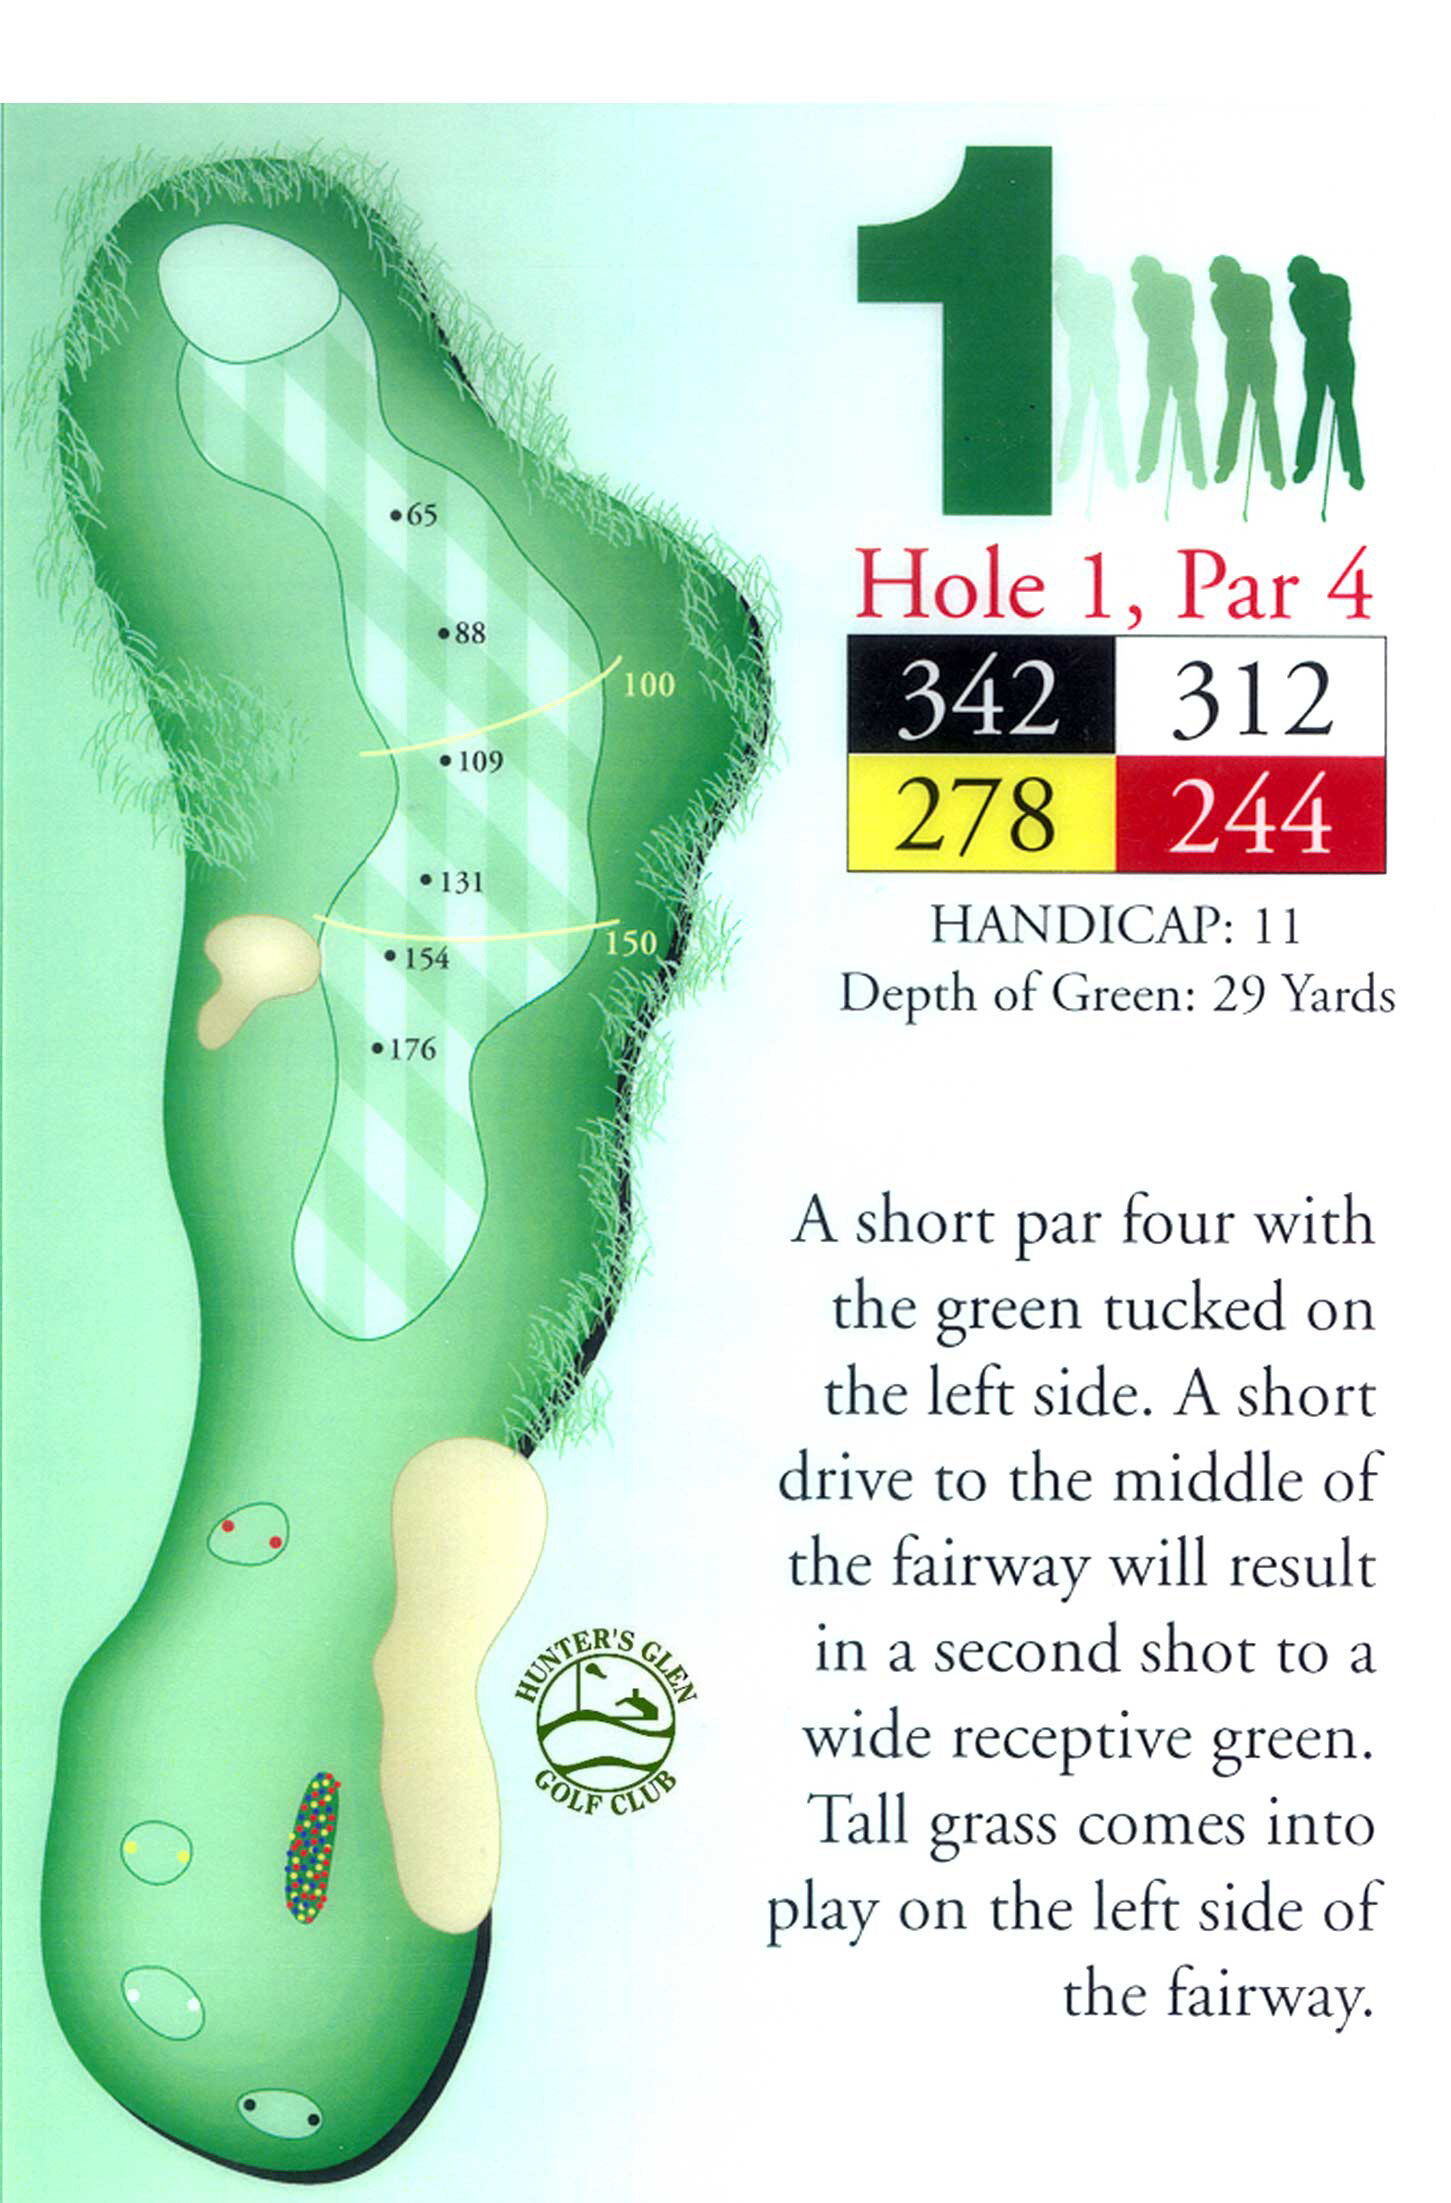
Hole 1, Par 4
A short par four with the green tucked on the left side. A short drive to the middle of the fairway will result in a second shot to the wide receptive green. Tall grass comes into play on the left side of the fairway.

Hole 2, Par 3
This par-3, features a sand bunker that makes up a large portion of the fairway, plus wines down the hole’s left side to protect the left flank of the putting surface. Note the small pot bunker on the front right side of the green.

Hole 3, Par 4
A mid-length par 4. From the tee, golfers will see a wide crowned fairway with out-of-bounds to the far left and sand bunkers positioned much closer on the right. The drive should favor the left side. The farther back the pin, the less room for error. A wide green slopes away on the back right corner.

Hole 4, Par 5
A straight away par 5, ranked as the course’s #1 handicap hole, it happily plays easier than its handicap. Downhill for the last 150 yards enables the hole to be reached in two with a good drive. One cannot stray, however, as mounds covered with tall grass line both sides of the fairway from tee-to-green.

Hole 5, Par 4
This dramatic hole presents a splendid visual from it’s elevated tee. A wide landing area gives room for error off the tee. A short precise iron to a flat green surrounded by flowered woods full of perennial and annual flowers will give a good opportunity for birdies.

Hole 6, Par 4
The par four 6th looks much like the 5th with some exceptions; it’s slightly longer in length and the fairway is much tighter. Dense vegetation guards the right side of the fairway. A good drive from this tee will leave a player with a middle, to short iron, to an inviting green.

Hole 7, Par 4
One of the longer par 4’s on the course. A precise tee shot is the key to this hole. Don’t be too far right, as your approach may be blocked by the tree lined fairway.

Hole 8, Par 3
Your club selection here will be influenced by the ever changing wind conditions. This par 3 is free of sand, but provides a sloping green that is tough to putt.

Hole 9, Par 5
An excellent par 5 with wind conditions that will dictate the playing length of this hole. The fairway narrows toward the green as two large traps guard the right side and lateral hazard protects the left. The green is sloped and works down from back to front.
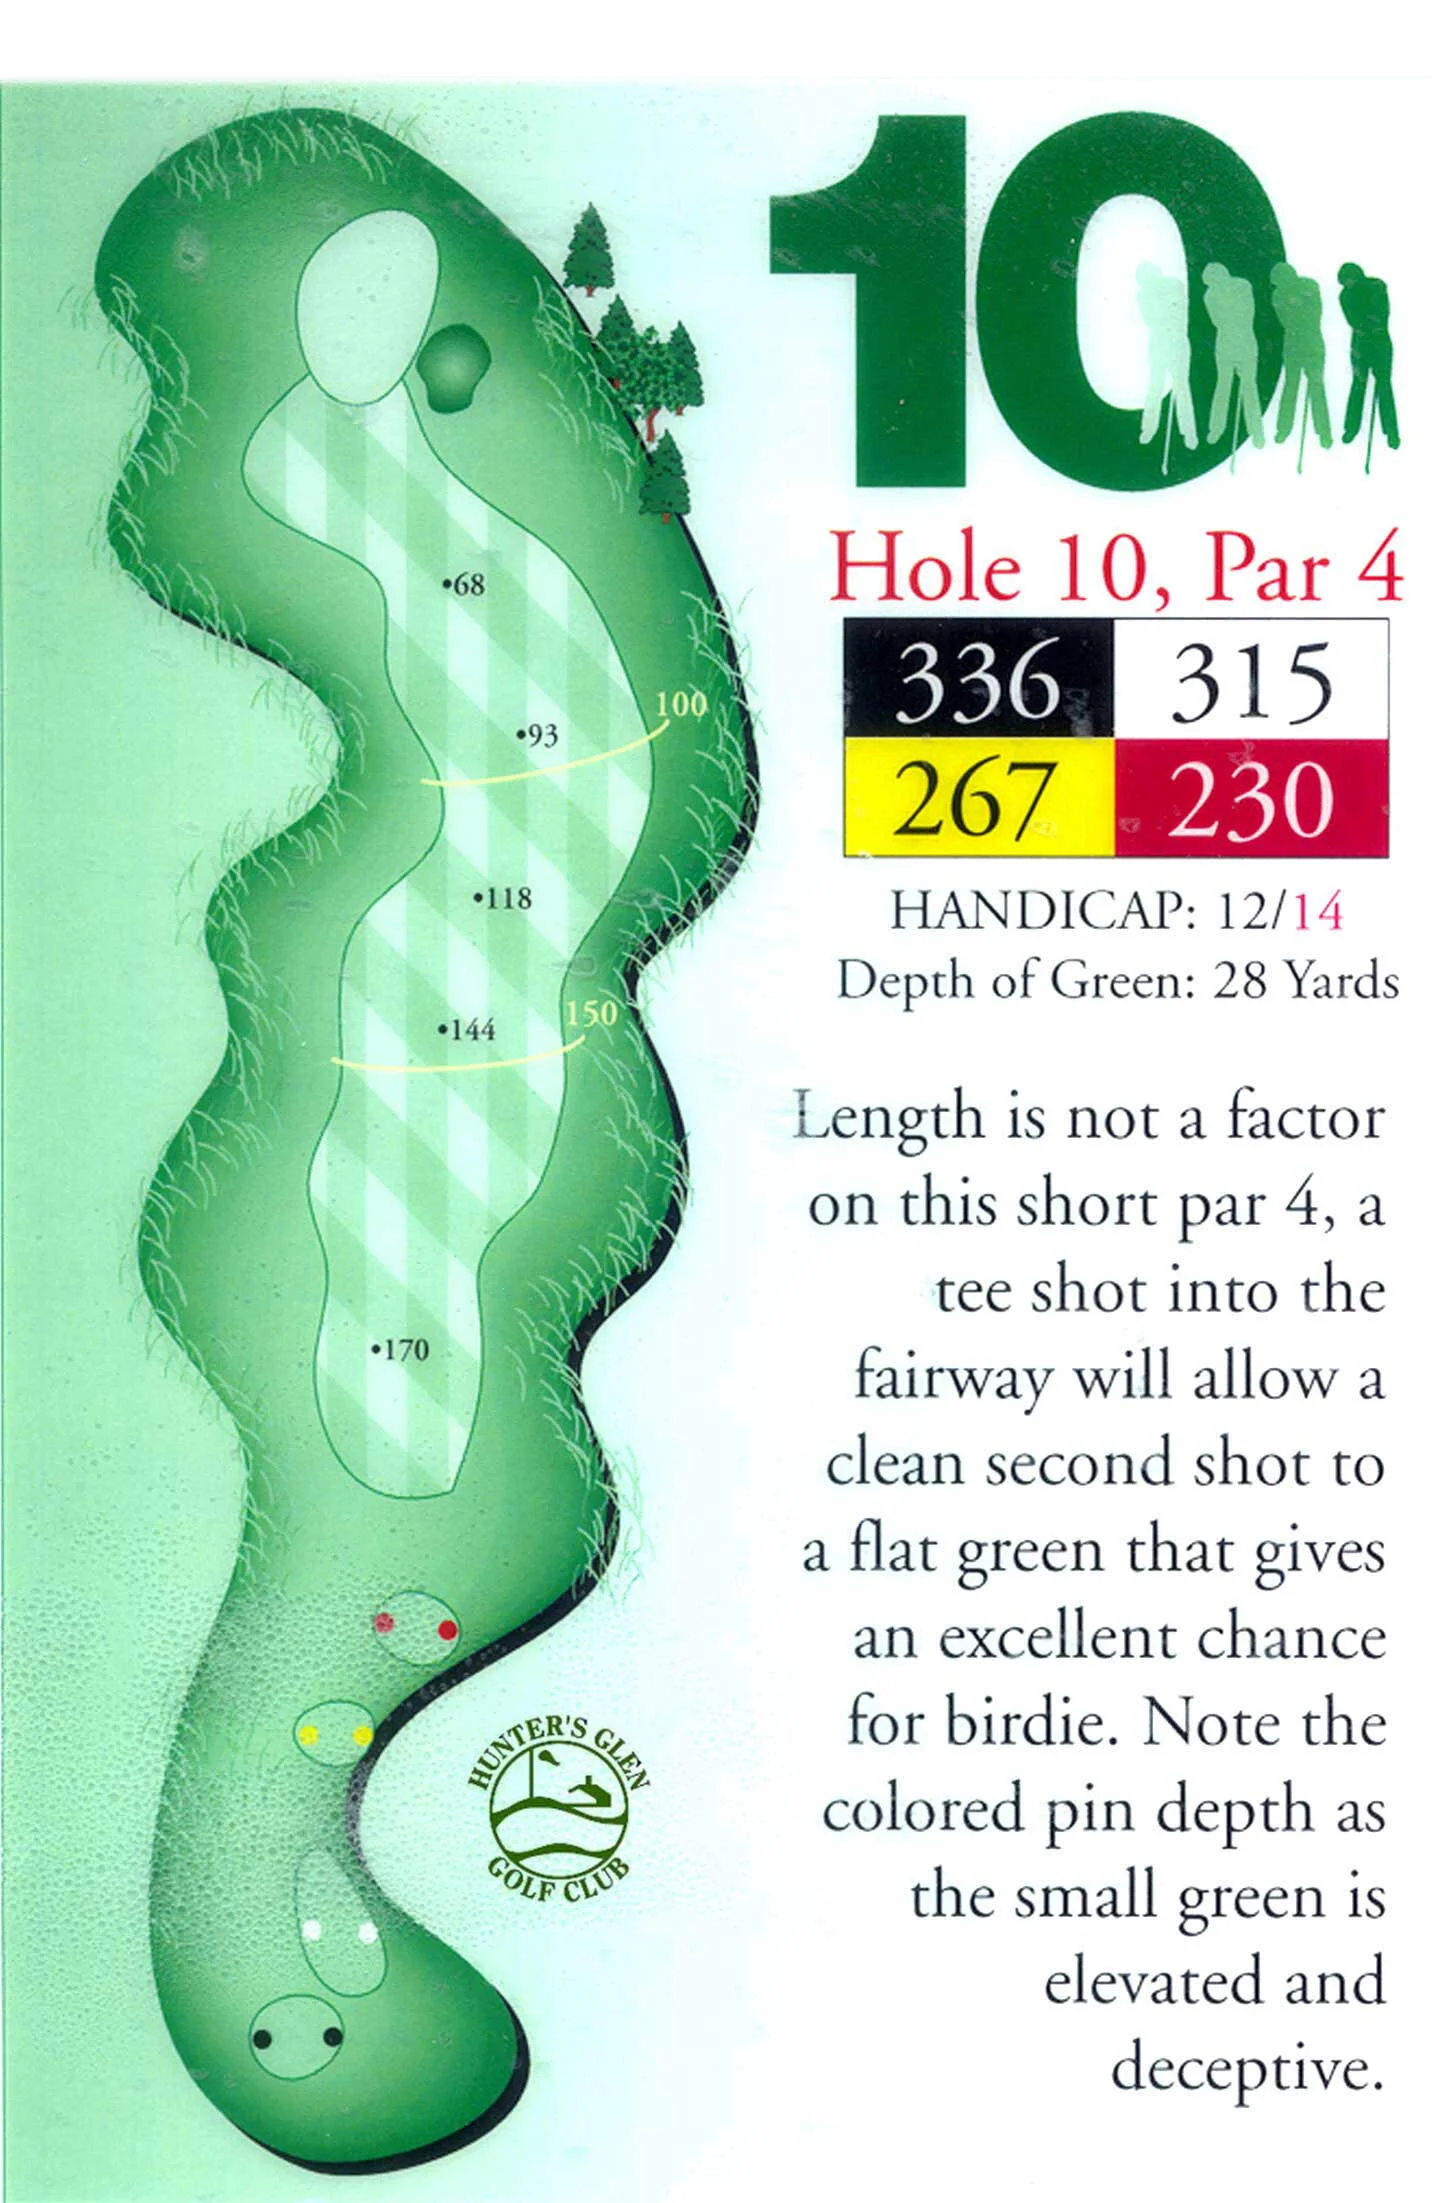
Hole 10, Par 4
Length is not a factor on this short part 4, a tee shot into the fairway will allow a clean second shot to a flat green that gives an excellent chance for birdie. Note the colored pin depth as the small green is elevated and deceptive.

Hole 11, Par 4
A longer par 4 with trees on the left that eats up drives for lunch. The green is protected by woods on the back and right. This hole ends with a green that has many players walking away wondering why they three-putted.

Hole 12, Par 5
Course management is a must on this par 5. A good drive will allow the long hitter to reach the green in two. A conservative approach would be to clear the water hazard and allow your short game to finish up this hole. A two tiered green will test your course management skills.

Hole 13, Par 3
A medium length par 3 that plays longer than the yardage indicates. Swirling winds above tree line will effect a high tee shot.

Hole 14, Par 5
A long uphill par 5 that requires a precise drive to carry the natural wetlands. It is best not to try to reach the green in two, play position golf. Fairway traps and long rough guards the right side.
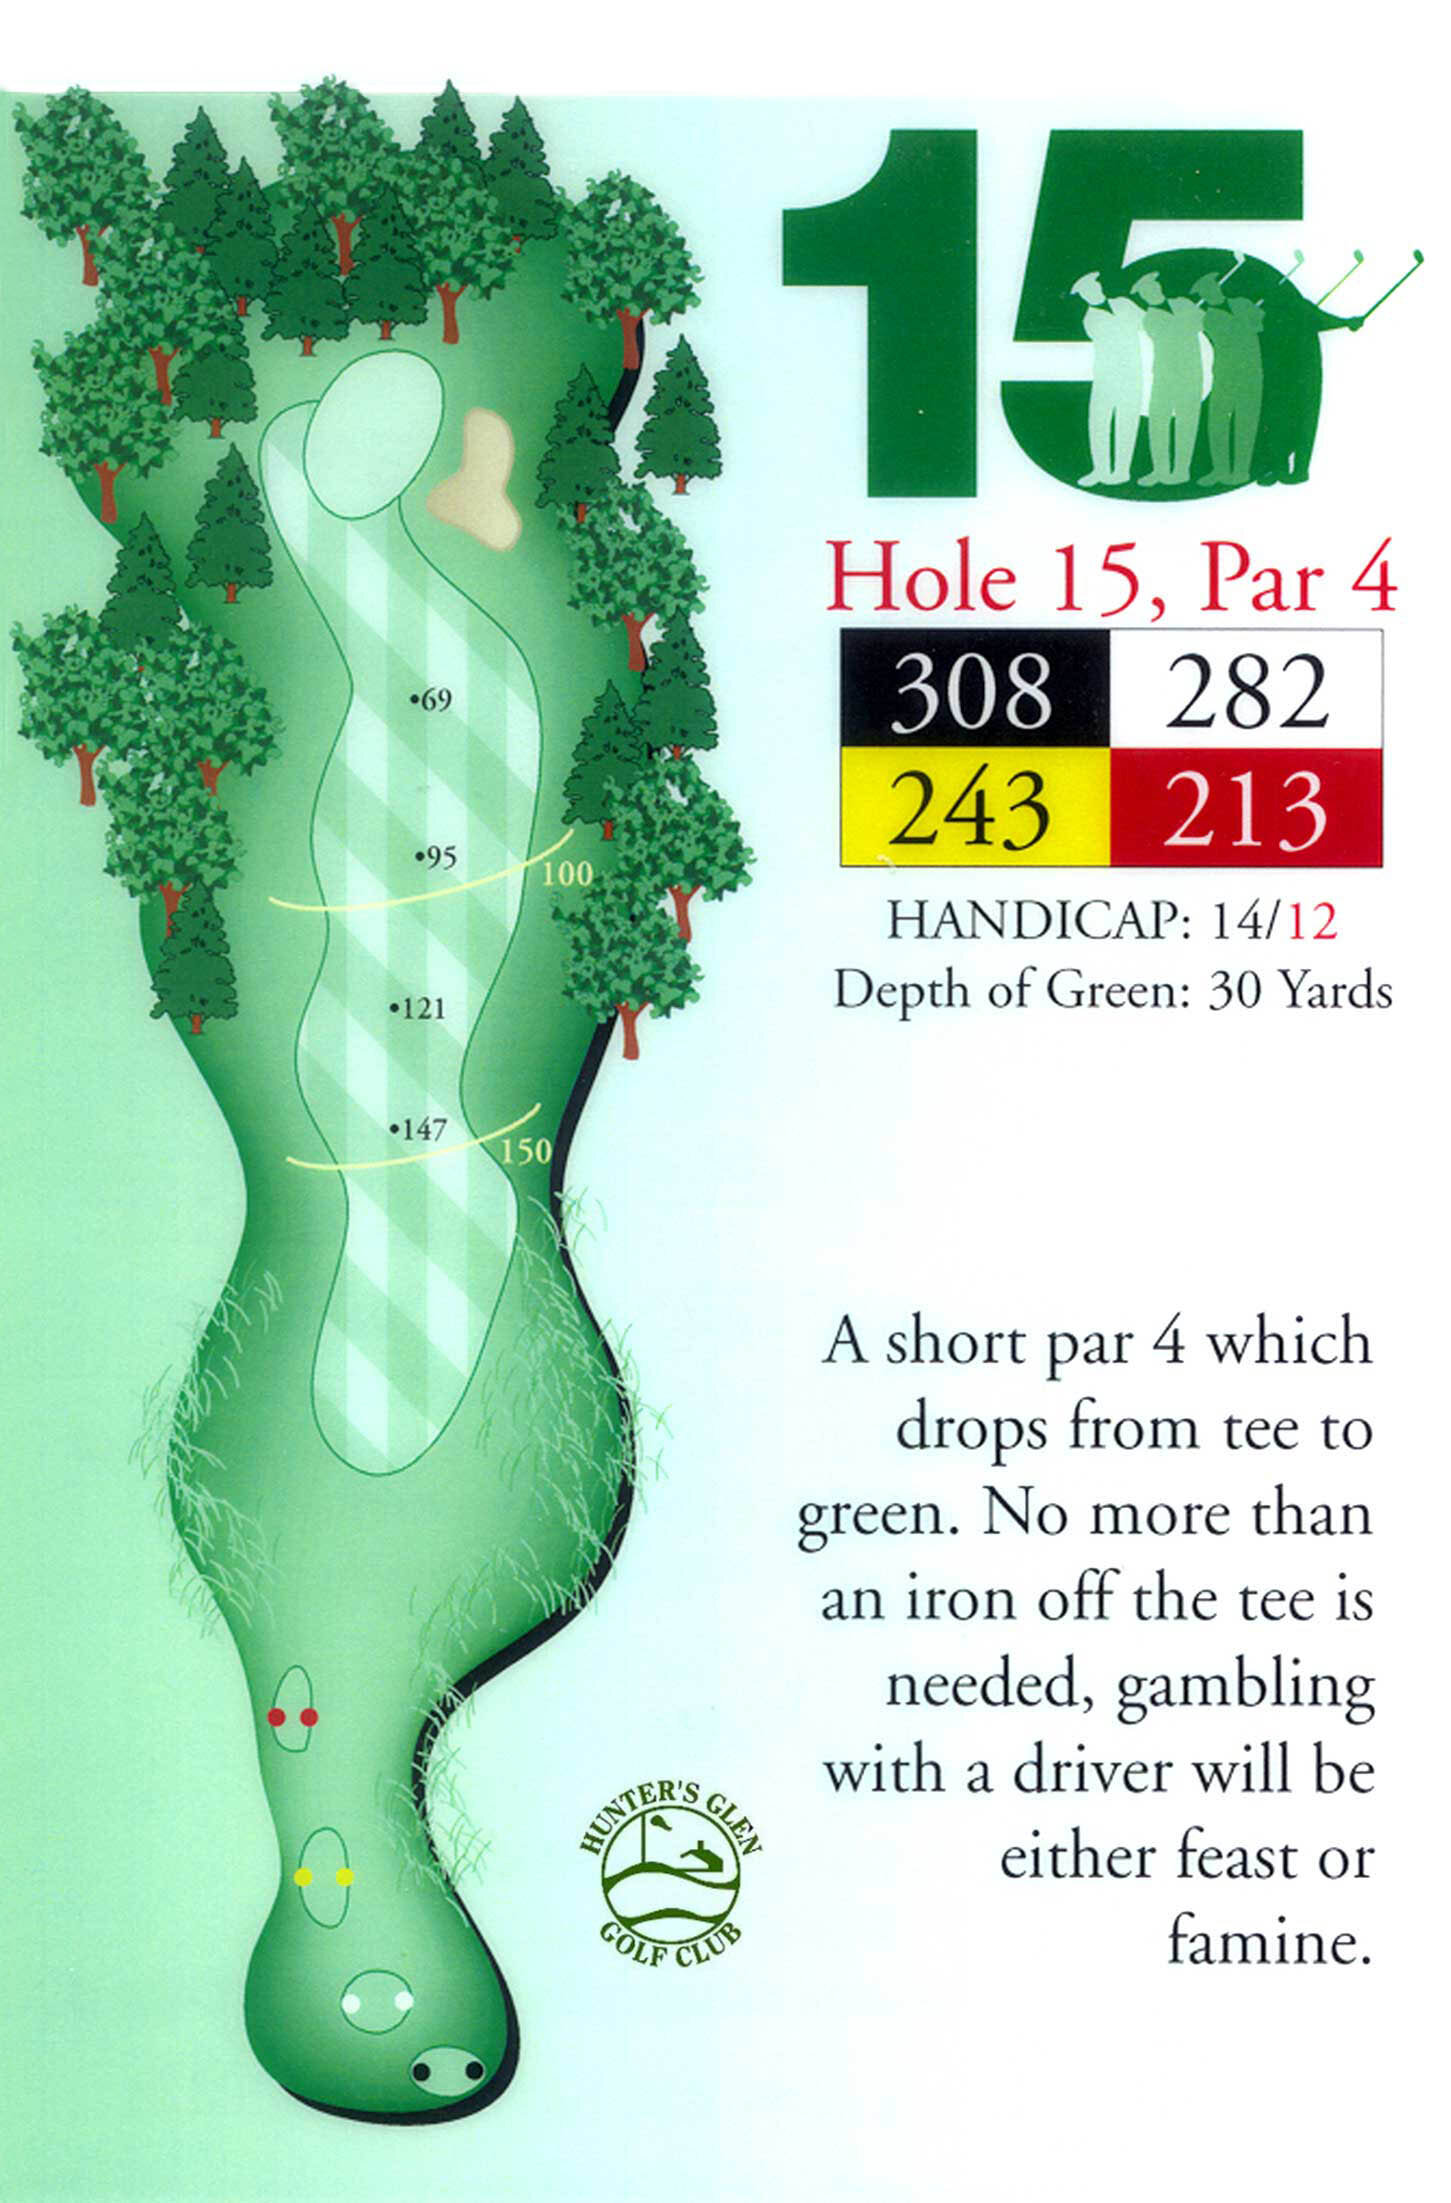
Hole 15, Par 4
A short par 4 which drops from tee to green. No more than an iron off the tee is needed, gambling with a driver will be either feast or famine.

Hole 16, Par 4
A great par 4 - favor the left side with a driver. An accurate shot to an elevated crowned green will allow for a solid par down the stretch.

Hole 17, Par 3
The most difficult par 3 on the course. These is a little room to the right if you need it. Take your par and run!

Hole 18, Par 4
A tremendous and unique finishing hole. A true appreciation to course architect Rick Jacobson. Dogleg right with a large bunker bisecting the massive fairway. A perfect drive between the center and the right side bunkers will open up the green for a short iron shot. A large trap guards the left side of the green.
